watz cookin, baby?
Friday, 20 April 2012
MORE CAKES 2011 !!
NOT a birthday cake! .......only a red-bean filled green tea Swiss Roll
WEN's BIRTHDAY CAKE 28th Oct 2011
Friday, 13 April 2012
Birthday Cakes 2011
PENG LIH'S BIRTHDAY CAKE 10th Oct 2011
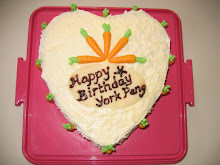
YORK PENG'S BIRTHDAY CAKE 3rd Oct 2011
OREO CHEESECAKE - NADINE'S BIRTHDAY 2nd Sept 2011
FEATHERLIGHT CHEESECAKE - DAVID'S BIRTHDAY 20th Aug 2011
A SLICE OF THE OREO CHEESECAKE - Nadine's birthday
Cupcakes 2011
Flower Arrangements 2011
Wednesday, 7 October 2009
Birthday Cupcakes for York Peng/Swee Fong - 3rd Oct 2009
Birthday Vanilla Slice
Birthday Vanilla
Older Posts
Home
Subscribe to:
Posts (Atom)
Carrot Cake
Blog Archive
▼
2012
(4)
▼
April
(4)
MORE CAKES 2011 !!
Birthday Cakes 2011
Cupcakes 2011
Flower Arrangements 2011
►
2009
(9)
►
October
(5)
►
September
(2)
►
March
(2)
►
2008
(19)
►
November
(1)
►
October
(10)
►
September
(8)
►
2007
(4)
►
August
(4)
About Me
buns 'n roses
View my complete profile
My Blog List
Lily's Wai Sek Hong
Bingka Beras Improved
8 years ago
My Kitchen Snippets
Spicy Salted Eggs/Sambal Telur Masin
9 years ago
yochana's cake delight index
Checkerboard Cookies
10 years ago
Do What I Like
Raspberry Chocolate Cake
10 years ago
The Journal of a Girl who Loves To Cook
Hopping about!
13 years ago
If she can do it, so can you.
Cinnamon Rolls (Just like Cinnabon!)
13 years ago
Redneck Recipes
Labels
baked
cake
char siew
chocolate
cream cheese
dates
dessert
durian
gula melaka
kueh
pandan
snack
Followers